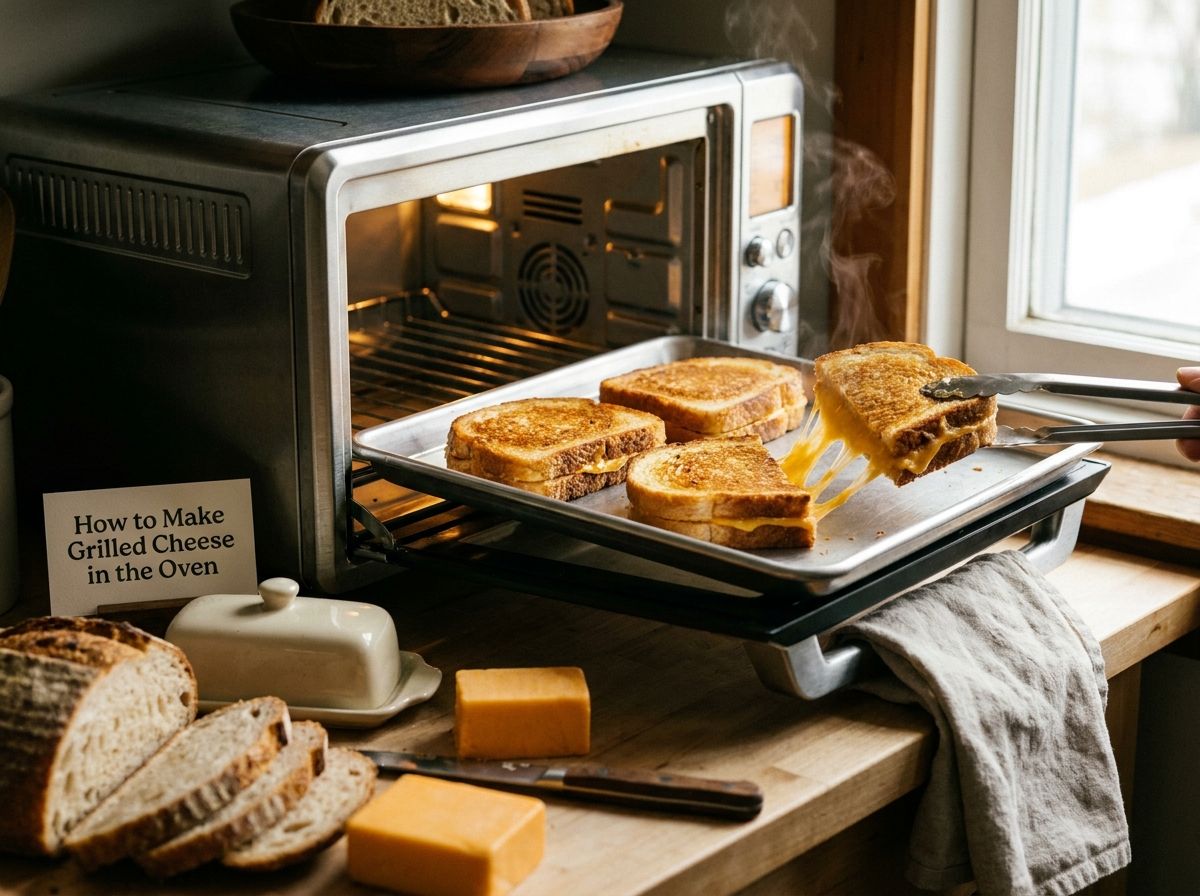
Yes, you can absolutely make grilled cheese in the oven and honestly, once you try it this way, going back to the stovetop feels like extra work. Set your oven to 450°F, butter one side of each bread slice, put them butter-side down on a baking sheet, stack your cheese on top, close them up butter-side facing up, and bake for around 5 to 10 minutes flipping once in the middle. Done. That is the whole method. Natasha’s Kitchen helped push this sheet pan approach into the mainstream and for good reason. It just works.
But there is a bit more to it if you want them coming out golden and crispy instead of pale and sad.
Why Bother With the Oven at All
Fair question. The stovetop is right there and most people already know how to use it for grilled cheese. So why switch?
Honestly, one reason: volume. If you are making more than two sandwiches, the stovetop becomes a hassle fast. You are standing there flipping one at a time, the butter starts burning by the third sandwich, and half of them are cold before everyone sits down. The oven solves all of that. You load up a whole sheet pan, slide it in, and everything comes out at the same time. No hovering, no adjusting heat, no cold sandwiches.
And the result is actually really good. The bread gets evenly toasted on both sides because the oven heat surrounds everything at once. On the stovetop you are always relying on one side touching the pan. In the oven both sides get that heat.
What You Actually Need
Bread, cheese, butter. That is the list.
For bread, something with a bit of structure is what you want. White sandwich bread works. Sourdough works even better. Texas toast is honestly great for this because it is thick enough to hold everything together without going limp. Avoid the really thin stuff because at 450°F it toasts almost too fast before the cheese melts.
For the cheese, sharp cheddar is the go-to for a reason. It melts well, it tastes like something, and it holds up. If you want it extra melty and stretchy, add a little mozzarella to the mix. The cheddar does the flavor, the mozzarella does the pull. Works really well together.
Butter goes on the outside of the bread. The side that will touch the pan and the side facing up. Spread it evenly and all the way to the edges or those edges stay pale and soft. Some people use mayonnaise on the outside instead of butter. It sounds weird but it browns more consistently and does not burn as quickly. Either one is fine, just pick what you have.
The Actual Steps
Preheat the oven to 450°F. While it heats up, butter one side of every bread slice. Lay half of them butter-side down on a rimmed baking sheet. Add cheese to each one, then put the tops on with the butter facing up.
Bake for 5 to 6 minutes. Flip every sandwich carefully. Bake another 3 to 4 minutes. Both sides should be a deep golden brown and the cheese should be fully melted when you cut into them.
Let them sit for a minute before you slice. The cheese is very hot right out of the oven and it needs a second to settle.
The One Trick Worth Knowing
Put your baking sheet in the oven while it preheats. Let it get hot before any sandwiches go on it.
When you place the sandwiches on a hot pan, the bottom slice starts crisping the second it makes contact. It is the closest thing to a griddle effect you can get in a home oven. The difference is very noticeable, especially on the bottom crust. You get that satisfying crunch instead of just lightly toasted soft bread. Takes zero extra effort, you just need to remember to do it before you start building the sandwiches.
Making a Big Batch
This is where the oven method is basically unbeatable. A standard large baking sheet holds six to eight sandwiches depending on how big your bread is. Two sheet pans and you are feeding a full table without breaking a sweat.
One thing that matters when doing a big batch is spacing. Do not let the sandwiches touch each other on the pan. The hot air needs room to move around each one. If they are pressed together the edges do not crisp, they steam. And steamed bread edges on a grilled cheese is not what anyone is going for.
If you are using two pans, rotate them between the top and bottom rack halfway through baking. The top rack runs hotter so the pan that starts on the bottom needs to move up to finish evenly.
Getting the Cheese to Actually Melt
The two things that affect this most are how thick your cheese is and how cold it was going in.
If you are slicing cheese yourself, keep it around an eighth of an inch thick. Thicker than that and the bread toasts before the cheese has time to melt through. Pre-shredded cheese melts faster and spreads more evenly across the bread, which is why a lot of people prefer it for this method.
Also, let your cheese sit out for ten minutes before assembling. Cold cheese straight from the fridge takes longer to melt. In a short high-heat bake, that extra chill can mean you end up with toasted bread but still-firm cheese in the middle. Room temperature cheese catches up much faster.
Bread Thickness Matters More Than You Think
The sweet spot is somewhere around three quarters of an inch. Thick enough to stay sturdy, thin enough to heat through properly. Texas toast is consistently in that range which is why it shows up in so many oven grilled cheese recipes.
If your bread is on the thinner side, watch it closely in the last two minutes. At 450°F things can shift from golden to overdone quickly and thin bread gives you less margin for error.
Conclusion
How to make grilled cheese in the oven is one of those things that sounds almost too basic to be worth learning. But there is a real difference between one that comes out with a deep golden crust and fully melted cheese versus one that is just warm bread with cheese stuck inside. The preheated pan, the right temperature, the spacing on the sheet, all of it adds up. Try it once for a group and it will probably become your default method going forward.