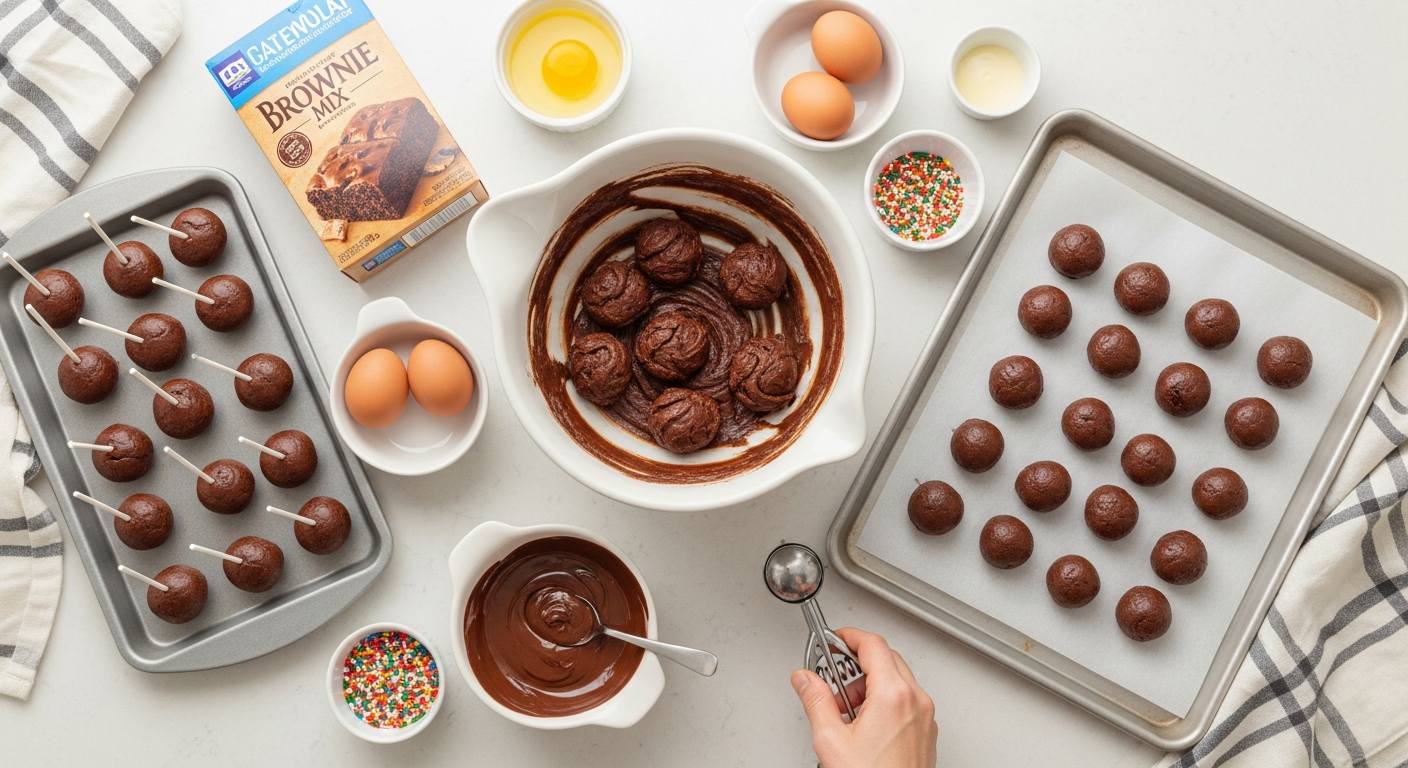
Yes – you can totally make cake pops using a boxed brownie mix! In fact, this simple trick turns fudgy brownies into bite-sized pops on a stick. Start by baking the brownies according to the package, then let them cool completely. Crumble or mash the brownies into a dough-like mixture (you can even stir in a spoonful of frosting or cream cheese if needed to help them stick together). Roll the mixture into small balls, insert a lollipop stick in each one, and chill them in the freezer. Finally, dip each ball in melted chocolate or candy coating and add fun toppings. The result is rich, chewy brownie cake pops that anyone can whip up at home.
Brownie cake pops are basically just cake pops with brownies instead of cake – and they taste amazing! As Desserts on a Dime puts it, a boxed brownie mix “transforms into decadent cake pops” that are “fudgy and delicious” yet easy to make. You’ll save money versus buying treats from a bakery and have fun making them with family or friends. Barbara Bakes even notes that kids can join in – “little hands can help roll the brownie balls and add sprinkles,” making it a “kid-approved process” for a family cake-baking activity.
Ingredients
-
Boxed brownie mix: Use a fudge-style mix if possible (for extra moist, fudgy pops). You’ll also need the oil, water, and eggs called for on the box.
-
Mix-in (optional): If your brownies seem too dry to hold together, you can blend in a couple of tablespoons of cream cheese or frosting. Start with 1/4 cup frosting and add more if needed until the crumbs form a sticky dough.
-
Lollipop sticks or cake pop sticks: About one stick per pop.
-
Chocolate coating: 12–16 ounces of chocolate or candy melts. This can be chocolate chips, melting wafers, or even white chocolate if you like. Shortening or a drop of vegetable oil helps thin the coating.
-
Decorations (optional): Sprinkles, chopped nuts, colored sugar, or extra melted chocolate for drizzling. Use any toppings you like – pink candy melt for Valentine’s, orange for Halloween, green for Christmas, etc..
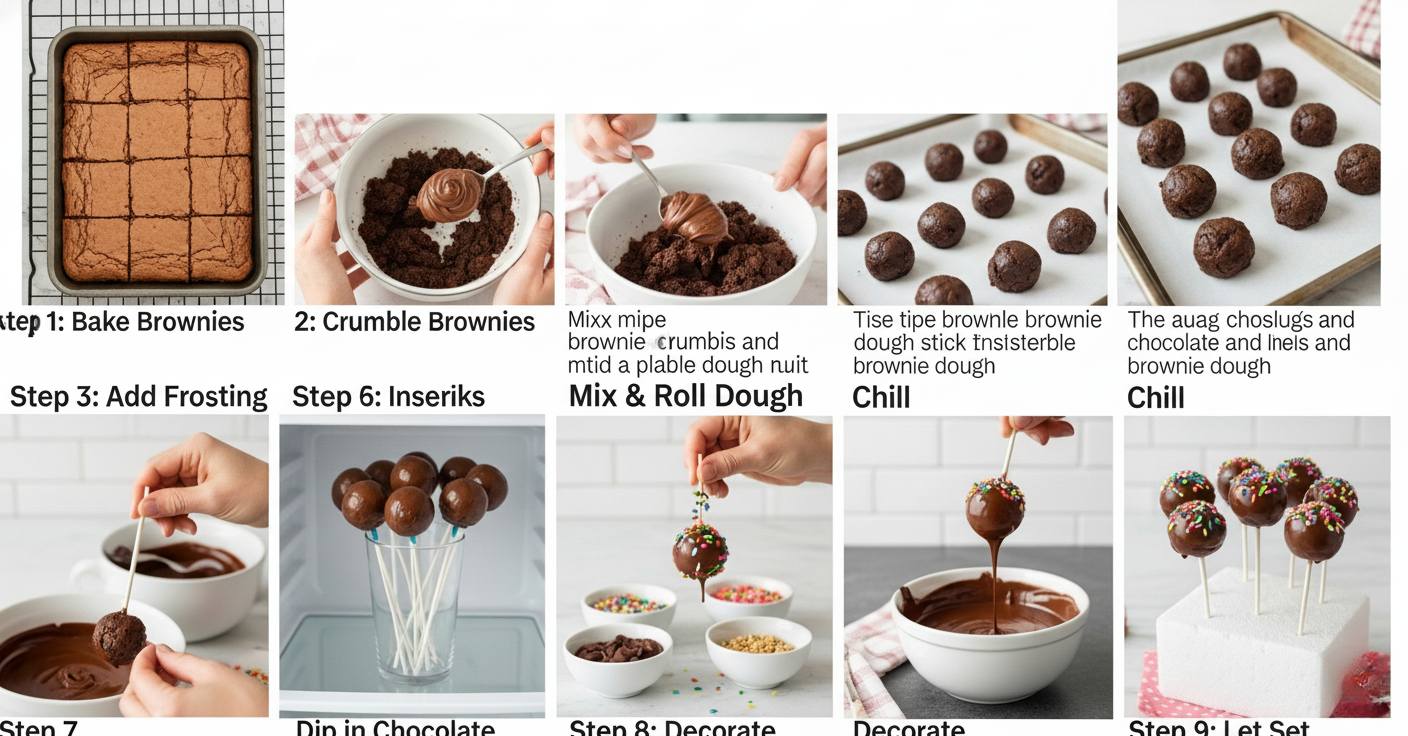
Step-by-Step Instructions
-
Bake the brownies. Follow the package directions to bake the brownie mix (using the ingredients on the box). Pour the batter into a greased pan and bake until a toothpick in the center comes out mostly clean (about 25–35 minutes for a typical 8×8 or 9×9 pan). Let the brownies cool completely in the pan – this usually takes at least an hour. (As Barbara Bakes explains, you want the edges firm and the middle set before cooling.)
-
Crumble and mix the brownies. Remove the cooled brownies from the pan. Trim off any hard crusty edges and set them aside (they’re tasty for snacking or topping ice cream). Crumble the remaining soft brownie into a large bowl. Mash or stir the crumbs until they are as fine as you can get them. If needed, mix in a little frosting or even a spoonful of softened butter/cream cheese to help the crumbs hold together.
-
Form brownie balls. Scoop or roll the brownie mixture into balls about 1–1½ inches in diameter. You can use a small ice cream scoop or tablespoon to keep them even. Place the balls on a baking sheet lined with parchment paper. Insert a lollipop stick or cake pop stick into each ball, pushing it about halfway through so the pop stays stable.
-
Chill the pops. Put the tray of sticks-and-balls in the freezer for 1–2 hours, or in the fridge until they are very firm. Freezing is key – it makes the balls easier to dip without falling apart. (Greasing or dipping the tip of each stick in a little melted chocolate before inserting also helps it stick better as it freezes.)
-
Melt the coating. In a microwave-safe bowl, melt your chocolate or candy melts. Do this in 30-second intervals, stirring each time, until smooth. Stir in a teaspoon of vegetable oil or shortening if the coating is too thick; this thins it out for a smooth dip.
-
Dip and decorate. Working one pop at a time, dip each frozen brownie ball into the melted coating. Use a spoon to help cover it completely if needed. Gently tap the stick on the side of the bowl to let excess chocolate drip off. Immediately before the coating sets, sprinkle on your toppings (nonpareils, sprinkles, chopped nuts, etc.) or drizzle with contrasting melted chocolate. Place each finished pop upright (stick down) in a block of foam or a glass so it can dry.
-
Let them set. Allow the chocolate coating to harden completely. You can speed this up by standing the pops in the fridge for a few minutes. Once set, your brownie cake pops are ready to enjoy!
Tips for Decorating and Serving
Now the fun part – decorating! Get creative with colors and toppings. For example, you could pour melted white chocolate over the dip for a cool drizzle effect, or use colored candy melts to match a holiday theme. As Barbara Bakes shows, you can “scatter sprinkles on the top of the pop while the chocolate is still wet” for a bright, festive look. The embedded photo above shows rainbow sprinkles added right after dipping. Let the decorations stick before the coating hardens, and stand the pops on their sticks (in foam, a stand, or even by tipping them stick-down into a cup) as they dry. Once the chocolate is firm, arrange them on a plate or wrap them in cellophane for gifts.
Storing Your Brownie Cake Pops
Brownie cake pops keep quite well. Store them in an airtight container in the fridge for up to 5–7 days. (Dessertsonadime recommends separating layers with wax paper to prevent sticking.) If you need to prep ahead, you can freeze the uncoated brownie balls for up to a month; then dip them when you’re ready. Coated cake pops can also be frozen, but be sure to wrap them well so they don’t absorb other flavors. Let frozen pops thaw in the refrigerator before eating.
Enjoy these easy homemade brownie cake pops at parties, as treats for the kids, or whenever you want a fun dessert! They’re rich, fudgy, and customizable. As one blogger sums it up, you’ll be amazed how simple it is to turn a brownie mix into “decadent cake pops”. Give it a try and have fun popping!